Shooting at high ISO can result in noise. Most of the time noise both color and luminance are found at dark areas of the photos. Applying noise reduction to the photos will also result in reduction of details. I've devised a method in selectively reducing noise on my photos shot at high ISO. Below is step by step guide to my selective noise reduction work flow on photoshop. (Click on the images to view full size)
1. Open the file
2. Create a duplicate layer of the file
3. Apply Noise reduction to the entire photo. You may use any noise reduction filter you like. I prefer the Reduce Noise Filter.
Old Structures Converted into Exceptional Homes
I've always enjoyed designing. Since I was in college, I've always preferred to create designs from scratch. I wanted to explore different possibilities without any constraints. One advantage of being a student is that there are no limitations.
We have always been given the freedom to express our creativity. Our school encouraged us to explore new designs. After becoming an architect, reality has crept in. Restrictions and budgets have always been present in almost all projects. In order to accomplish my projects, I had to adjust to reality.
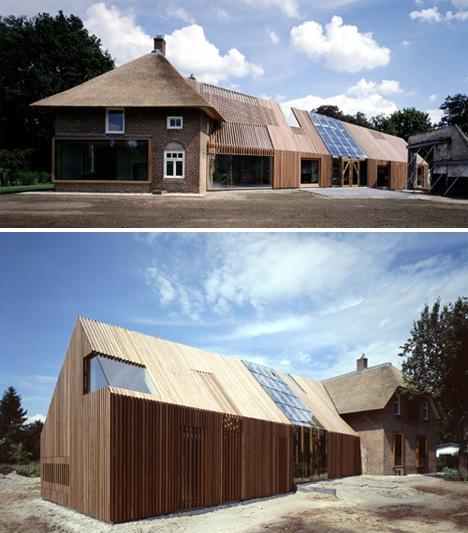
Barn to House adaptive reuse Designed by: Bjarne Mastenbroek (SeARCH)
Subscribe to:
Posts (Atom)
-
For most of us, the office is where we spend a lot of our waking time. Whatever your line of work, mounting work and approaching deadlines w...
-
Decent shelter is a major problem here in the Philippines. Due to poverty a lot of families here have little access to a decent home. I'...
-
Tiny living spaces have always been of interest to me. It always astounds me how a well-designed small space can still offer comfort to the ...
-
Are you searching for an efficient and elegant design for a tiny house on 60 square meters of land? Our most recent design for a tiny ho...